New Roof Leaks in Heavy Rain: Find and Fix the Source
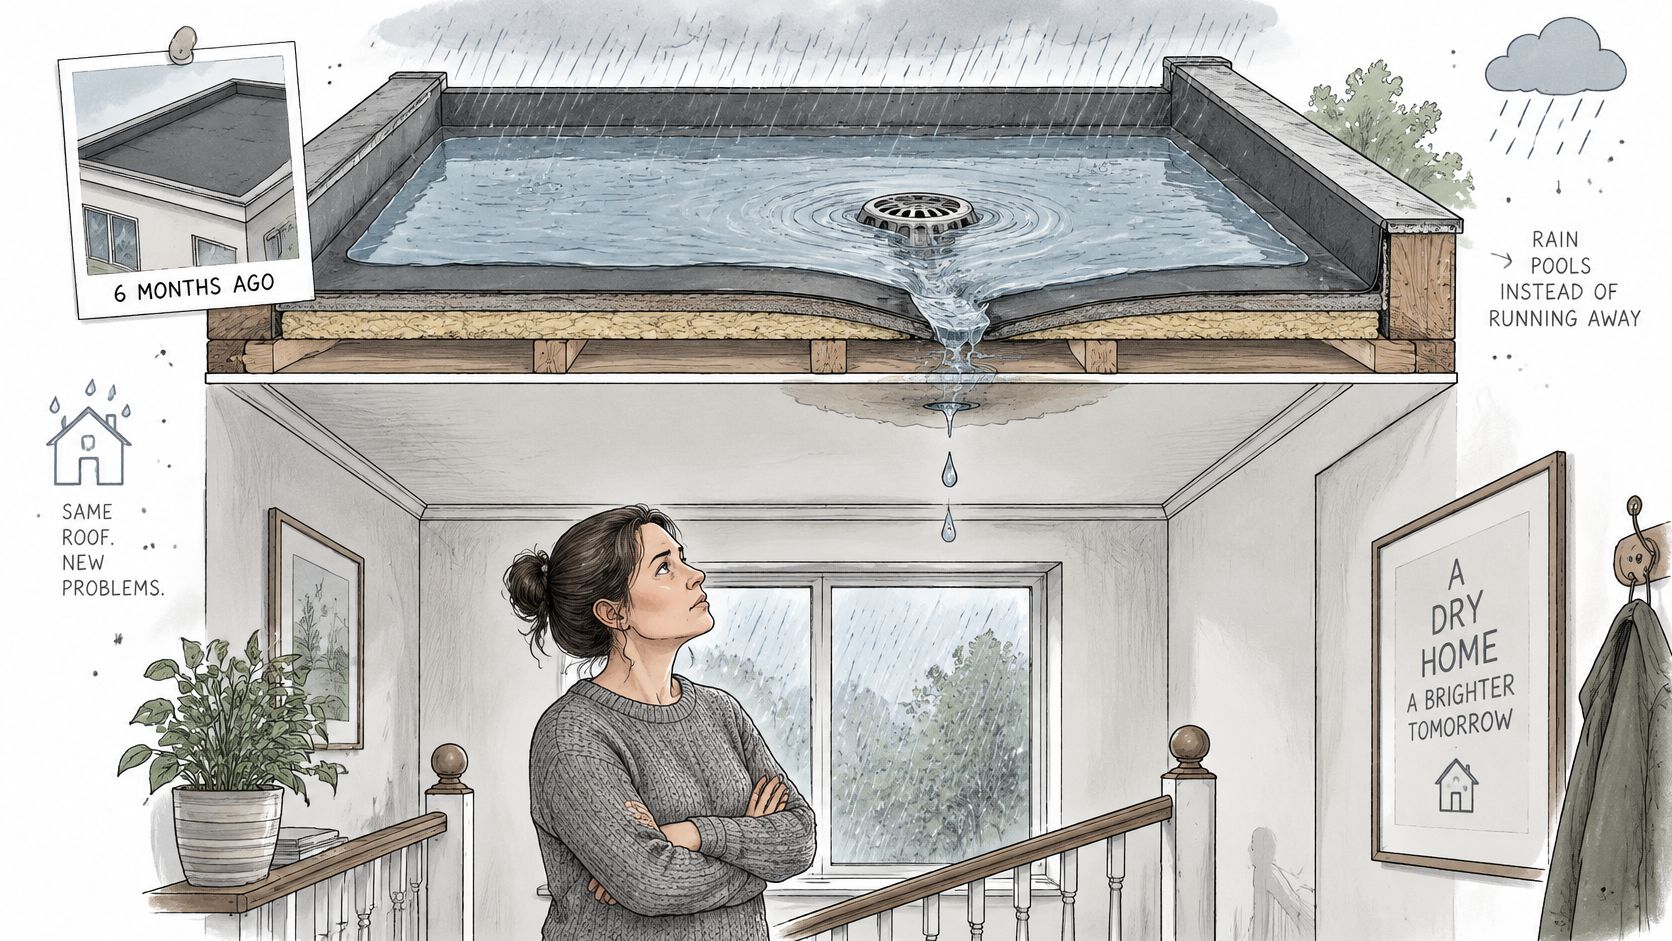
A roof you paid for six months ago has started dripping. It only does it in very heavy downpours, the sort that turns the gutter into a waterfall and sends everyone scrambling to close windows, and the ceiling stain has a crisp brown edge that widens a little more each time. You’re standing there with a bucket, wondering whether the whole job was botched.
Hold that thought. What you’re looking at is a diagnostic question with a small number of possible answers, and none of them begin with “rip the whole thing off”. New roof leaks in heavy rain are usually about where water got in and how fast it arrived, and those two things can be separated with a torch, a hose and a bit of patience.
Here’s how to think it through the way an inspector would, starting with why the leak waits for a storm.
Table of Contents
- Why New Roofs Leak in Heavy Rain
- Leak Locations, Causes and Urgency
- Gutters, Downpipes and Overflow Under Heavy Rain
- What to Do in the First Hour of a Leak
- How to Trace a Leak Back to Its Source
- Record Evidence and Sort Out Who Pays
- Know When to Call a Roofer and What to Ask
Why New Roofs Leak in Heavy Rain
A roof isn’t a lid. It’s a drainage system, and every part of it is sized to move water off the building faster than the sky delivers it.
Think about a bath with a plughole. A trickle from the tap vanishes without a sound. Tip a bucket in fast enough and the water finds the overflow, the rim, the gap behind the taps. Nothing cracked. The water arrived faster than the drain could carry it, and it found the weakest edge.
New Zealand pushes that capacity hard. NIWA’s heavy rainfall research records the country’s highest daily rainfall at Colliers Creek near Hokitika, 682 millimetres across 21 and 22 January 1994, and the same national climate-risk assessment projects an 11% increase in the 1-in-10-year, one-hour rainfall event. That second figure matters more to a householder than the first. A short, violent burst can force water through a gap on a day whose total rainfall never comes near a record, because gutters, valleys and flashings are handling water at a rate nobody sized them for. NIWA also notes that prolonged extreme rain drives moisture into walls and leaves indoor air damper.
When a new roof leaks in heavy rain, sort the cause into one of three families before anyone quotes a repair:
- Detailing at junctions and penetrations. The collar around a vent pipe, the apron where roof meets wall, the lap inside a valley.
- Drainage that can’t keep up. Gutters, outlets, internal box gutters and downpipes that are undersized, blocked or badly positioned.
- Workmanship or material faults. A missed lap, a cracked tile, a seal that was never going to last a decade.
The reframe is worth saying plainly. A heavy-rain leak on a new roof is first a question of where the water entered and how much arrived. It isn’t proof of a bad installation, and it isn’t proof the roof needs replacing.
Leak Locations, Causes and Urgency
Start at the stain and work backwards.
Weathertight design guidance from the Ministry of Business, Innovation and Employment is blunt about where the weak points sit. Most leaks occur at junctions and penetrations through the building envelope, and roof-to-wall junctions, parapets and flat roofs are the recurring offenders. The reason is physics rather than poor trade work. Wind-driven rain doesn’t fall politely. It gets pushed sideways and upward, so water can travel past a lap that sheds ordinary rain perfectly well.
| Where water appears | Most likely cause | Urgency | First check |
|---|---|---|---|
| Around a vent pipe, skylight or solar bracket | Failed seal, collar or flashing | Medium | Look for cracked sealant or a lifted flashing |
| Where the roof meets a wall or veranda | Poor flashing lap or junction detail | High | Trace the stain up the wall line and check soffit boards |
| Along valleys or internal box gutters | Blocked outlet or undersized gutter | High during rain | Clear debris and watch the outlet for overflow |
| At gutters or downpipes, spilling over the edge | Blocked or undersized drainage | Medium | Check outlets, spreaders and fall toward the outlet |
| Ridge, hip or cladding area after wind | Displaced or cracked covering from wind damage | Medium to high | Look for lifted or missing pieces after the storm |
| Parapet or flat roof section | Ponding and a failed membrane seam | Medium | Check for pooled water and open seams |
| Ceiling stain away from any roof edge | Water tracking along underlay or framing | Medium | Trace the water upward from the stain |
Three patterns do most of the diagnostic work. A drip in the same spot every storm points at a flashing or a seal, because water is finding one fixed gap. A leak that only appears when the gutters are visibly overflowing is a capacity problem, not a covering problem. A stain that runs sideways along a wall line, or appears metres in from the roof edge, means water is travelling along underlay or framing before it drops, and the entry point is further up and further across than the stain suggests.
Wind adds a second mechanism that has nothing to do with drainage capacity. NIWA’s historical storm record documents an event where Kaeo took 254 millimetres of rain in 12 hours while gusts hit 180 kilometres per hour at nearby Tiritiri Matangi, and roughly one third of a New Plymouth hardware store’s roof was lifted. Once covering or flashing moves, rain that would have run off finds an open path in minutes.
Start with the row nearest your stain, photograph it before anything is touched, and treat that row as a hypothesis rather than a verdict.
Gutters, Downpipes and Overflow Under Heavy Rain
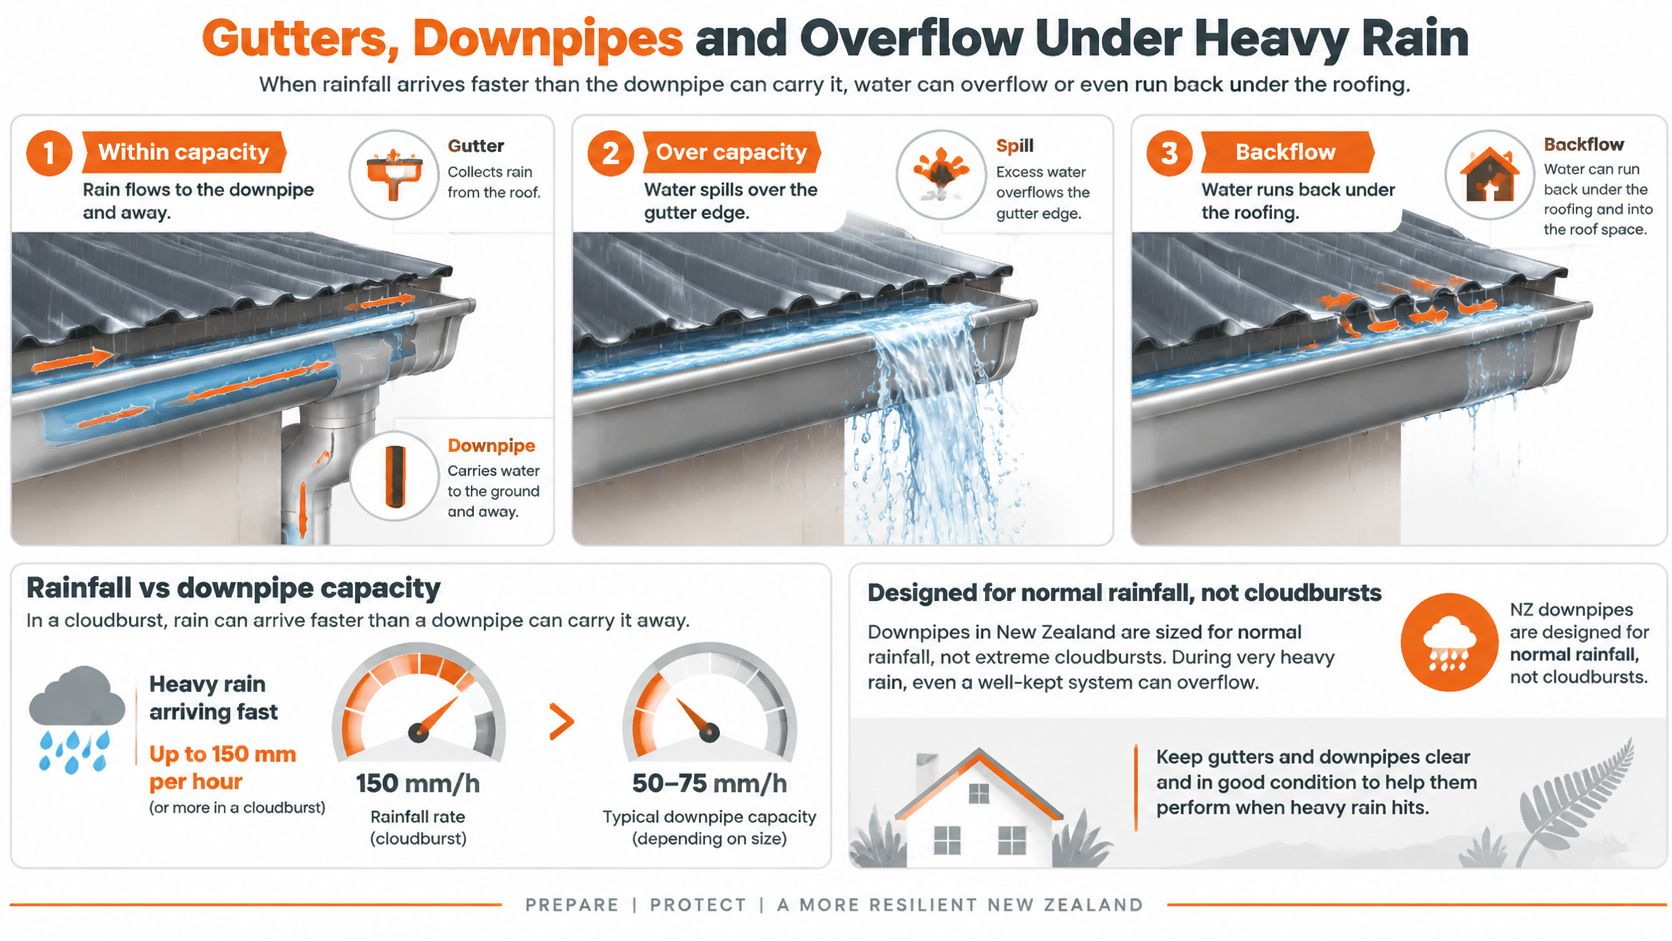
Rain is hammering the new spouting, and a sheet of water is pouring over the front edge onto the wall below. The covering looks intact. The drip inside started only after the gutter filled. That order is a drainage diagnosis: find where the water left the roof, check whether the gutters and downpipes can take the rain, then judge the workmanship.
A gutter works like a bath with one small plug hole. Send in more water than the outlet can pass, and the level rises until it spills, even when every joint is new. On a long or steep roof the catchment is larger than the gutter looks from the ground, so a brand-new run can still be too small, too flat, short of downpipes, or blocked by one handful of leaves at the outlet.
Drainage has to be sized to the rainfall the site is designed for. Outlets, rain heads and spreaders have to sit so overflow lands clear of walls and window heads. Spill that hits a wall, a window head or a deck junction gets a second chance to get inside. MBIE’s surface water guidance points designers to NIWA’s High Intensity Rainfall Design System, which gives location-specific rainfall intensity estimates from historical gauges plus projected intensities under climate-change scenarios, and states that where alternative design intensities exist the most conservative value should be used. Auckland, Wellington and Christchurch do not share one benchmark, so gutter, valley and outlet sizing has to match that site rainfall and the actual catchment.
Before you accept a quote for new metal or sealant, run these checks from the ground:
- Compare gutter size with roof area. A long run feeding one outlet is a warning sign on a large or steeply pitched roof.
- Count the outlets and downpipes. Then count them again from the other end of the house.
- Test the fall. A spirit level on the gutter, or a litre of water poured in at the high end, shows whether it drains or just sits.
- Look for ponding after the rain stops. Water still standing an hour later means the fall or the outlet is wrong.
- Watch where the overflow lands. If it hits a wall, a window or a deck junction, that is the next leak.
Workmanship still matters, after capacity is clear. A gutter with no fall, or an outlet packed with leaves, is a fitting or maintenance fault on an otherwise sound roof. A gutter that is clear, sloping the right way, and still spills in a heavy downpour is undersized for the catchment.
Capacity rule: If the drainage can’t handle the design event, the fix is more capacity and outlets placed so overflow stays off the walls.
What to Do in the First Hour of a Leak
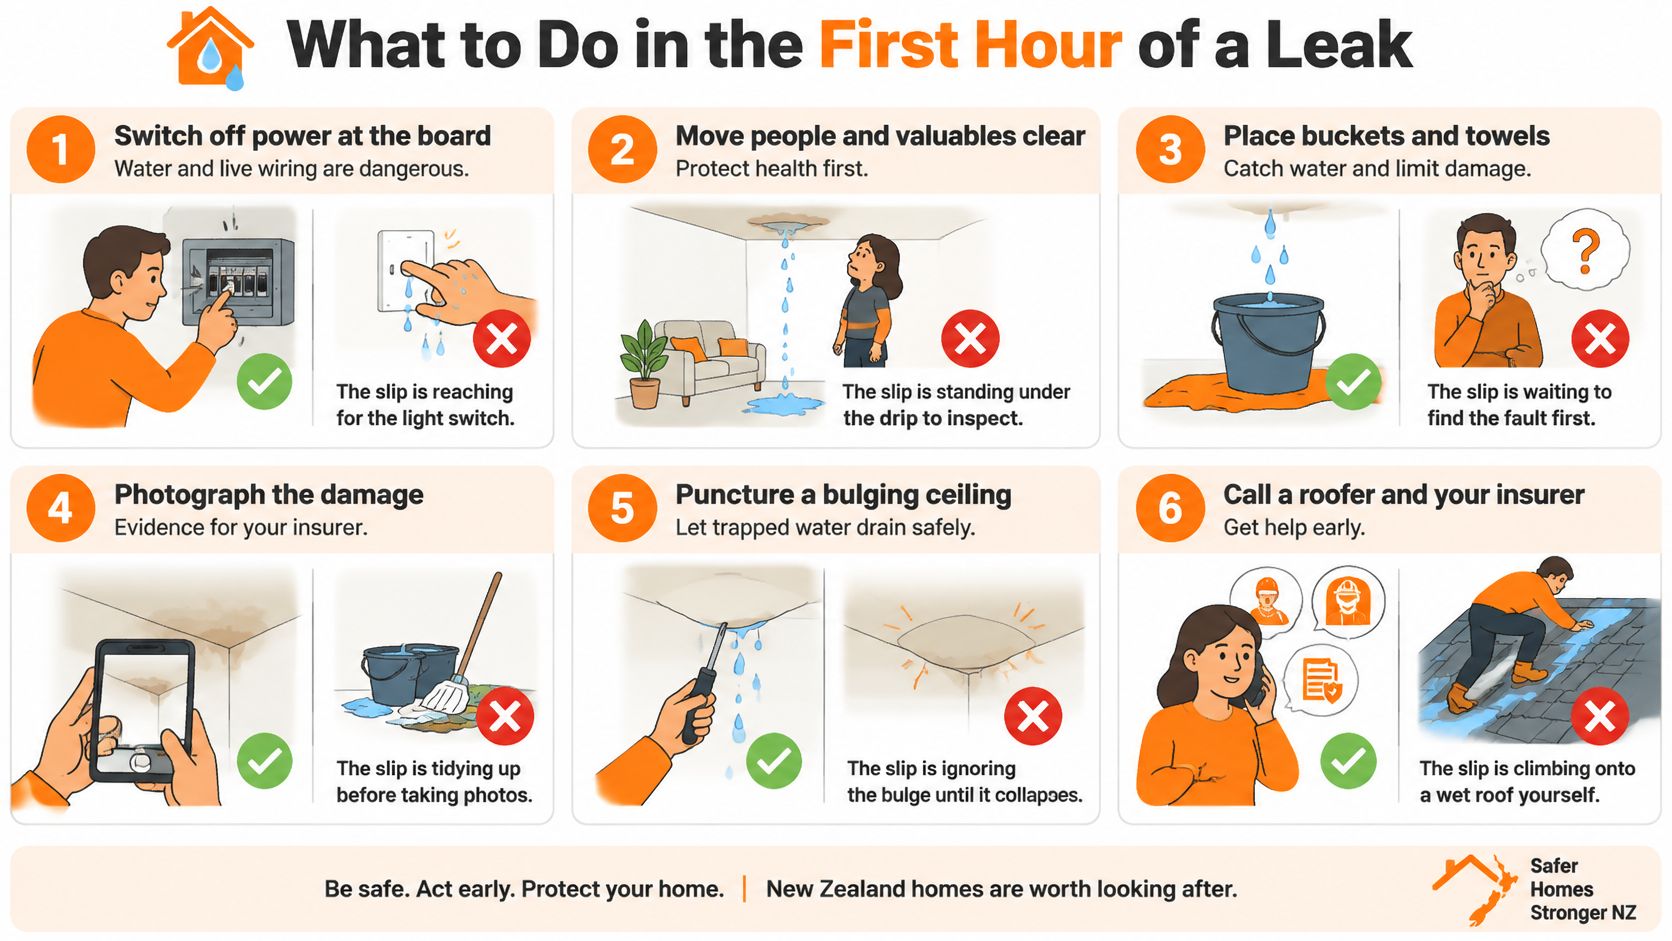
The first hour isn’t about diagnosis. It’s about people, power and evidence, in that order, because every repair decision afterwards rests on what you recorded while the water was still coming in.
- Kill the power to anything near the drip. Water and live wiring don’t mix, so switch the circuit off at the board before you go anywhere near a wet fitting. The usual slip is reaching for the light switch with wet hands on the way past.
- Move people and valuables clear. Shift furniture, electronics and anything paper away from the drip zone. The slip is standing under the leak to inspect it while water runs into a power point behind you.
- Put buckets and towels down. Catch what you can and protect the floor covering. The slip is waiting to find the fault first and letting water pool in a ceiling bulge.
- Photograph and film before you clean. The stain, the drip, the bucket filling, the rain outside, the clock. The slip is wiping the evidence away and then trying to describe it to an insurer.
- Don’t climb onto a wet or windy roof. Only place a tarp from inside the roof space or from ground level, and only if the leak point is reachable and conditions are safe. A fall in the rain is a far worse day than a wet ceiling.
- Note the timing. When the rain started, how long it lasted, and whether the drip slowed when it eased. The slip is assuming the leak is fixed because it stopped, when all that happened is the rain did.
First-hour rule: Protect people and evidence before you touch the roof. Drying the house and diagnosing the roof are two jobs, and they run in parallel.
The call you make now is for make-safe work, not the final repair. Make-safe means stopping further water entry and limiting damage, and you should ask for a written note of exactly what was done and what was observed, because that note becomes the starting point for diagnosis in dry weather. Once the water is stopped, the next risk is what stays wet: preventing mould after a roof leak is mostly about drying the ceiling lining and cavity quickly, and it’s a different trade and a different job from fixing the roof.
How to Trace a Leak Back to Its Source
A ceiling stain is a signpost, not a map. Water on a roof works like a slow spill on a sloping board: it runs along underlay, battens and framing until a joint lets it drop. A mark in the middle of a ceiling can therefore start at a wall junction two metres away.
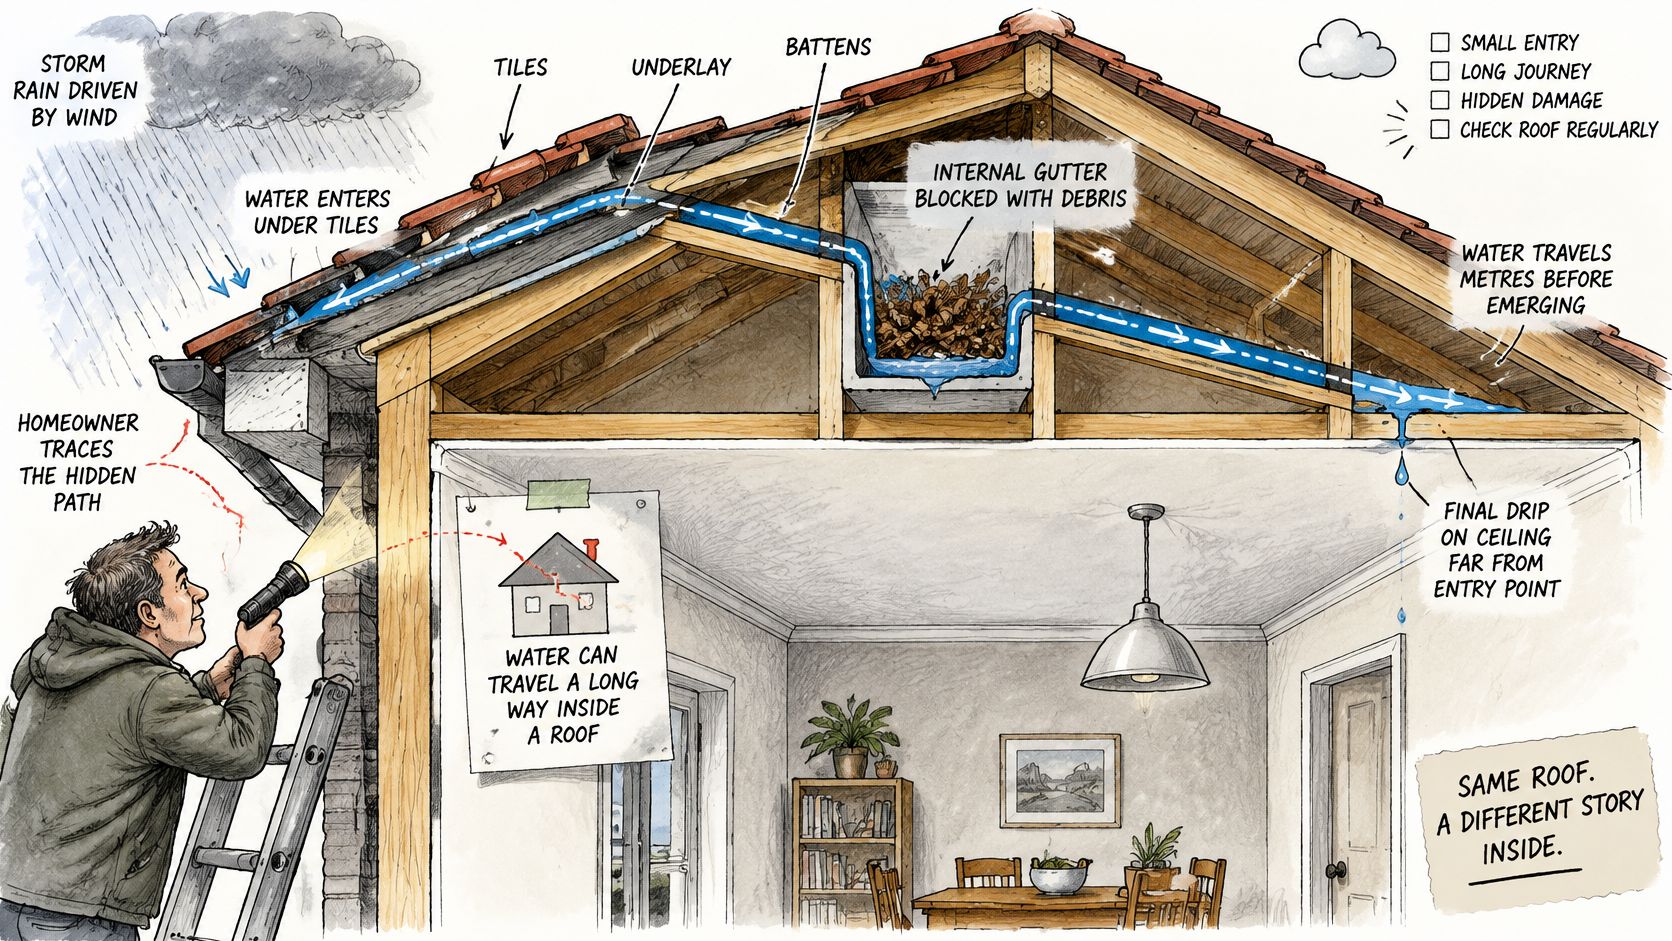
Rule out blocked drainage first. It is the cheapest check, and it answers a different question from workmanship. If the rain arrived and a gutter or internal box gutter was not emptying, that blockage is the first suspect. Water that cannot leave will rise against the covering and push in at a lap, even when the sheets themselves are sound. Clear that possibility before you treat the leak as a failed fixing or flashing.
Trace upward from the drip:
- Mark the edge of the stain with pencil and note which way the water appears to run. You need a baseline, because a stain that grows during the next storm tells you whether your theory holds.
- Go into the roof space in dry weather with a torch. Look for darkened timber, drip lines, rust on fixings and crushed or displaced insulation.
- Follow the wet path upward along framing and underlay until you reach the first point where the timber is dry. The entry sits just above that point, the way wet footprints stop at the door someone came through.
- Check the gutter or internal box gutter directly above. Clear the debris, then inspect the outlet and the overflow route, because a blocked outlet backs water up under the covering.
- Compare the entry point with the table rows, photographing each candidate from a safe access point rather than from the roof surface. You are sorting an entry point, a drainage limit, and a workmanship fault.
- Ask a roofer for a controlled water test if the cause is still unclear. A controlled test starts low and moves up in set intervals so the leak can be matched to a specific detail.
Leave that hose test to the roofer. Running water from the top soaks a wide area and still does not name the joint.
When the wet path, the outlet and one detail line up, the repair has a target: clear the drainage, reseal that junction, or both. A quote without that match is a price for a guess.
Record Evidence and Sort Out Who Pays
Responsibility follows the entry point, so diagnosis has to come before blame. Most disputes about a new roof and a storm go wrong because someone assigns fault before anyone has named the failure.
There are four realistic possibilities, and they carry different obligations:
- Defective workmanship or materials. A lap that was never sealed, a fixing pattern that doesn’t hold, a product that failed early.
- A design gap around penetrations, valleys or flashings. The detail was built as drawn, and the drawing didn’t manage the water.
- Blocked or undersized drainage and overflow routes. Maintenance or capacity, not the covering.
- Water entering through adjoining walls, decks or cladding. The roof is fine and the leak belongs to another element.
Keep the evidence that preserves a position regardless of which one applies: the contract and specifications, any producer statement, invoices, dated photographs and video, weather and rainfall records for the day, your maintenance history, and the exact point where water first appeared indoors. Ask the insurer about emergency mitigation and ask the roofing contractor about defect obligations as two separate questions, because they run on different timelines and different standards.
The obligation itself isn’t vague. New Zealand’s Building Code requires roofs to shed precipitated moisture under clause E2.3.1, and requires roofs and exterior walls to prevent water penetration that could cause undue dampness or damage under clause E2.3.2, as a Building Code determination on a leaking veranda roof junction sets out. That determination treated water entering an enclosed eaves during heavy wind-driven rain as evidence the junction didn’t meet E2 performance requirements, which is the point: the visible roof surface was never the issue.
The scale of the paperwork is not an accident. Claims from the 2023 Auckland Anniversary Weekend floods and Cyclone Gabrielle had reached NZ$3.7 billion by April 2024, according to the Reserve Bank of New Zealand, and the Ministry for the Environment reports that the 2021 extreme rainfall events behind Canterbury’s flooding were 10 to 15% more intense because of climate change, per Our Atmosphere and Climate 2026. Intense downpours can expose a system-level drainage or detailing weakness without clearing the installer of liability.
Practical rule: Never authorise a repair, or accept a denial, until the cause is named in writing with photos and a location on the roof.
Know When to Call a Roofer and What to Ask
It is 9pm, rain is hammering the new roof, and a dark patch is spreading across the ceiling. That moment decides whether you call tonight or wait for a dry day.
Call the same day if water is anywhere near electrics, if a ceiling is sagging or bulging, if roof sheets or tiles have lifted, or if water is coming in at several points at once. A ceiling that bows is a load problem. It works like a bucket filling faster than you can empty it: the plaster can fail while you wait for a clear forecast.
Book a full inspection within a few days when the only symptom is a slow drip at one junction during storms. A full roof walkover can wait for dry weather. Keep photographing each storm so the pattern is clear when the roofer arrives.
On site, ask for a diagnosis before you accept a repair list.
- Which exact point is the water entering, and how was that confirmed? You want a location, not a general area such as “somewhere on the north slope.”
- Is the fault in the covering, a flashing, the drainage, or a wall junction? Those four categories have four different fixes. A flashing that missed a lap is not the same job as a gutter that overflows in a cloudburst.
- Was the drainage checked against the site’s design rainfall? Ask for the gutter size, the outlet count, and the downpipe capacity.
- Will you provide a written report with dated photos? An insurer and a second contractor both need that record.
- What does the warranty cover, and who is responsible for the cause you have named? Materials and workmanship are separate promises.
- Will the work be done by a licensed building practitioner where the law requires one? Roof work is generally restricted building work, so the licence matters.
A full re-roof is a conclusion, not an opening offer.
Do not agree to a full re-roof at the first inspection unless the diagnosis names the failure and someone has compared the cost of the targeted fix with the cost of doing nothing.
Those same distinctions show up in how roofers advertise. An active leak and a full replacement are different jobs with different urgency, so they belong in separate campaigns rather than one catch-all ad group.
Bluelight builds and manages Google Ads systems exclusively for roofing companies, so a 9pm “water coming through the ceiling” search and a “re-roof quote” search are treated as the two different jobs they are. If storms fill the inbox and the rest of the month goes quiet, book Bluelight’s free intro call to see how leak-specific landing pages, call tracking and storm-timed campaigns could turn that spike into booked work, and keep the account and the leads in your name. Most Bluelight roofing clients see their first leads within 7 days of launch.
Related service Google Ads for Roofers