Google Ads Audit for Roofers: A Step-by-Step Checklist
Your Google Ads report looks healthy, but your roofing crew still has gaps in the calendar. The phone’s ringing, yet some callers want materials, some live outside your service area, and others have already submitted the same enquiry through your website.
That’s where a Google Ads audit should start. Before changing keywords or raising the budget, establish whether the leads you’re paying for are genuine roofing opportunities your team can quote and win.
Table of Contents
- The Roofing Google Ads Audit Checklist at a Glance
- How to Pull the Data and Check Billing First
- Confirming Every Conversion Is a Real Enquiry
- How to Structure Campaigns by Suburb and Service
- Sorting Search Terms and Blocking Wasted Clicks
- Working Out Your Real Cost per Qualified Lead
- Booking Your Audit Review This Month
The Roofing Google Ads Audit Checklist at a Glance
A low reported cost per lead can look like a win until duplicate, out-of-area or non-roofing enquiries are counted as prospects. Check lead quality before using the report to judge keywords, bids or budget.
Use this seven-point roofing Google Ads audit checklist for an initial account review. Mark each row pass, review or fix, and work through the checks in order.
| Audit area | What to check | Red flag |
|---|---|---|
| Billing | GST separated from media spend | Gross invoice treated as advertising spend |
| Conversion actions | Calls and forms checked against enquiry outcomes | Page views or button clicks counted as leads |
| Campaign structure | Campaigns grouped by roofing service | One campaign covering every service |
| Location targeting | Targeted areas match the crew’s service area | Nationwide or city-wide targeting for a local crew |
| Search terms | Recent queries sorted by intent | Repair, DIY or employment queries using most of the spend |
| Keywords and match types | Match types suit the core services | Broad match on the word roofing |
| Negative lists | Lists cover DIY, jobs, materials and out-of-area terms | No negatives beyond the platform defaults |
Use the previous 90 to 180 days for the audit window. That period can help separate a storm-driven rush from normal demand while still reflecting your current crew and service area.
Practical rule: Check spend and whether leads are genuine before trusting cost per lead.
Allow roughly ten minutes for an initial look at billing and conversion settings. That is enough to spot obvious issues, not to validate every tracking detail.
For context beyond Google Ads, Digital Skyrocket’s roofing marketing strategies for 2026 cover how paid search can fit alongside other enquiry sources.
How to Pull the Data and Check Billing First
Save the account as it stands before making changes. Otherwise, you’ll struggle to separate the effect of your fixes from changes in demand, spending or crew availability.
-
Export the performance baseline. In Google Ads, download campaigns, ad groups, search terms, locations, devices, hours, assets and conversion actions for the full audit window. Keep monthly breakdowns rather than exporting only the last 30 days after a quiet month, which can hide the seasonal pattern.
-
Confirm the billing details. Check the billing country, business address, payment setting and account status. Google’s New Zealand tax guidance says accounts with New Zealand business addresses are invoiced by Google New Zealand Limited and subject to 15% GST; prepaid accounts can receive an invoice when funds are added and another at month-end, while postpaid accounts generally receive a month-end invoice.
-
Separate media spend from GST. Reconcile the complete invoice set against your accounting records, not just the latest document. Using the gross invoice as media spend overstates the advertising cost by the GST component, while ignoring that component in cash-flow planning leaves money unaccounted for.
-
Compare budget with spend. Record the intended monthly media budget beside what the account spent. Investigate campaigns that stopped serving, payment interruptions and spending concentrated in periods when nobody could answer enquiries.
-
Review account access. Open Access and security and remove former staff or agencies that no longer need access. Keep an owner-controlled administrator login so you’re not dependent on an outside manager to retrieve your own reports.
Use this workflow to organise the export and billing checks before editing campaigns.
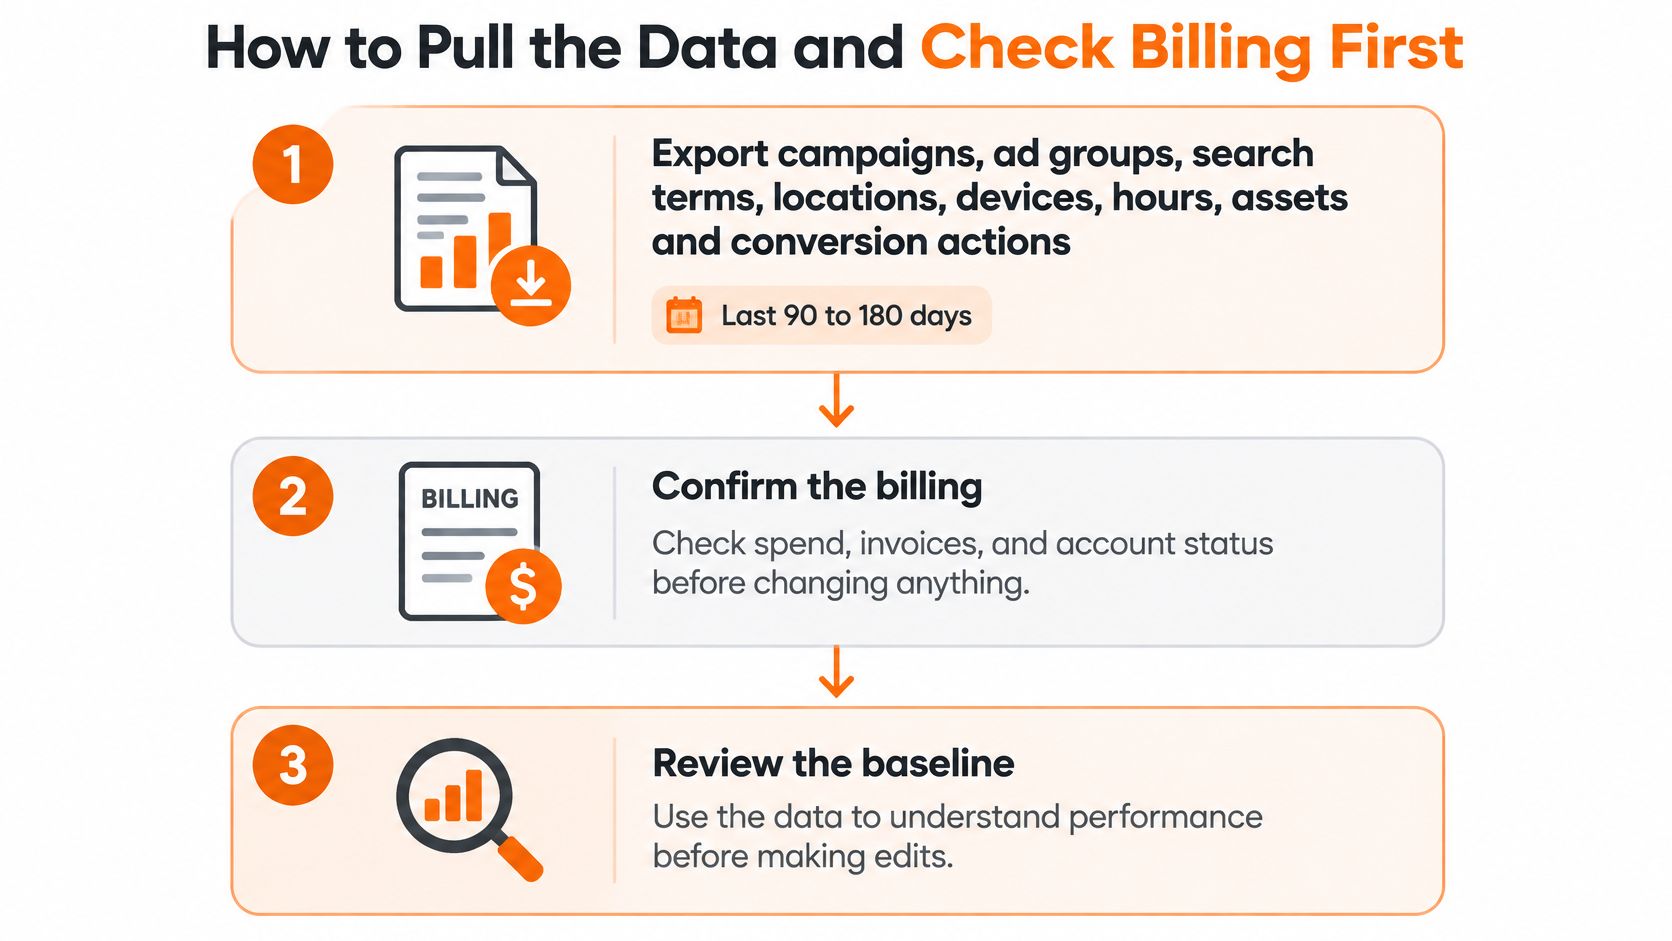
Keep a usable baseline
Save the exports in a dated folder with your invoices and a simple change log. Include notes about storms, holidays, unavailable crews or a phone outage, because those details affect how you interpret results.
Finish with a single line stating ex-GST media spend for the audit period. That’s the spending figure to use when calculating acquisition costs, separate from agency fees and other marketing expenses.
Confirming Every Conversion Is a Real Enquiry
Can you trust the reported cost per lead? You can’t answer that until the account’s conversion total agrees with identifiable enquiries and their outcomes.
Inventory every Google Ads conversion action, GA4 event, call-tracking number, form event, imported offline conversion and thank-you-page trigger. Test submissions yourself, including refreshing the confirmation page and submitting from a mobile phone.
Use this checklist to identify the measurement points that need testing.
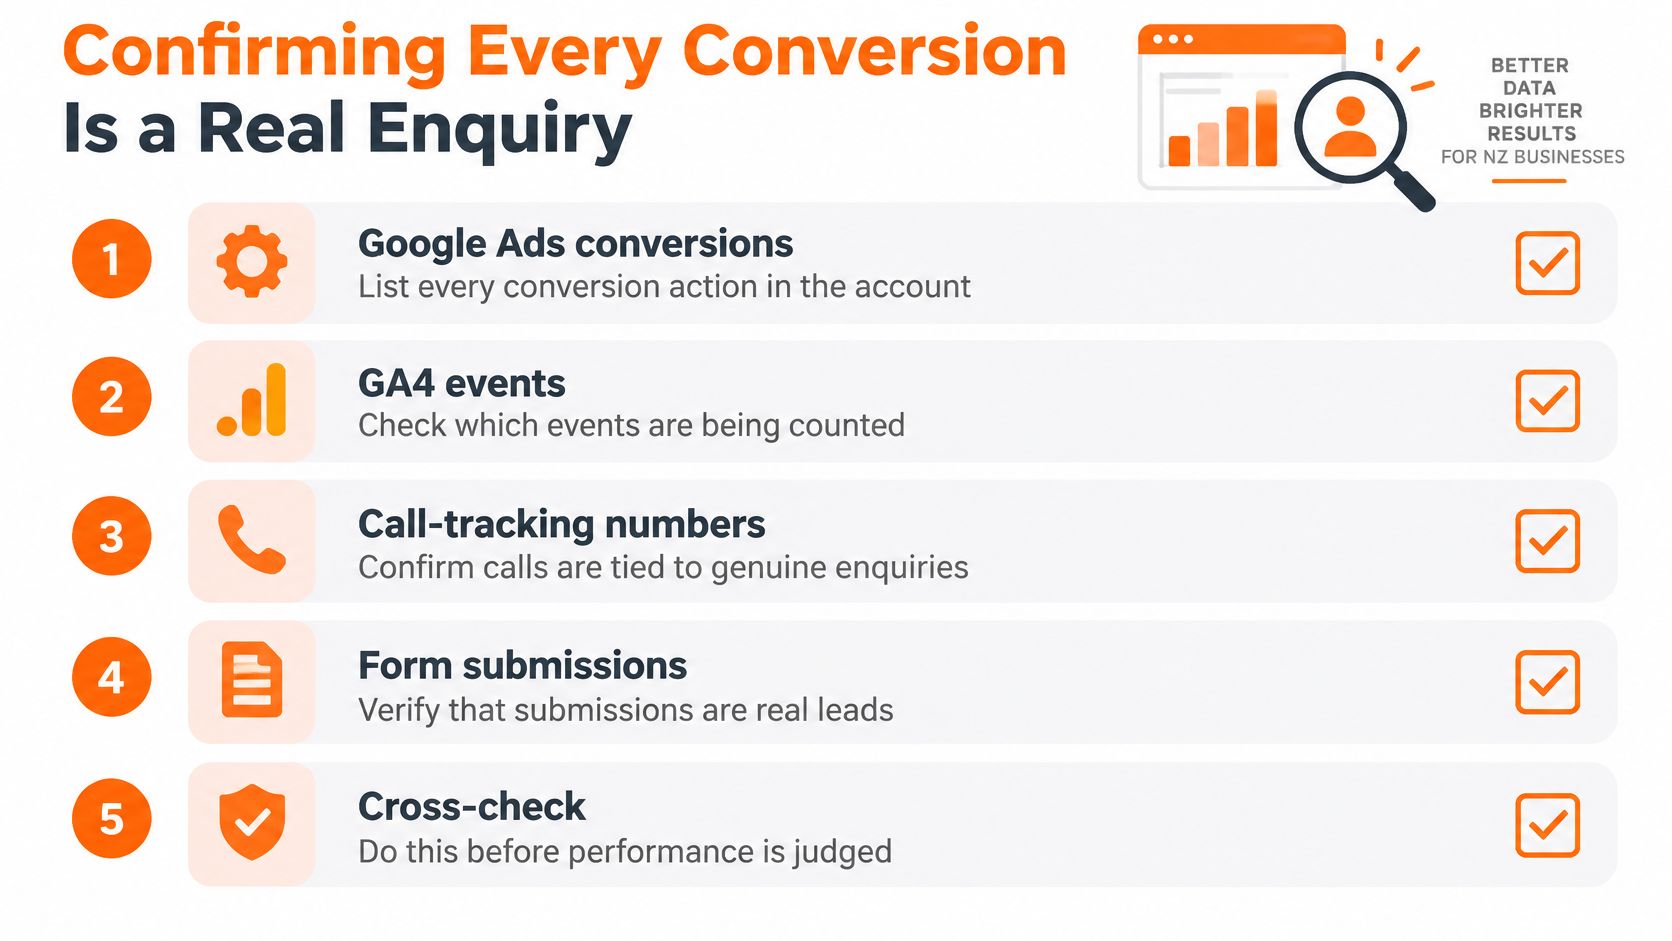
Reconcile enquiries with outcomes
Give each enquiry a unique lead ID in the form submission and customer relationship management system, or CRM. Keep later inspections, quotes and sales attached to that record so you can measure progress without counting each stage as a new lead.
A form conversion and an imported sale can both be useful events. The mistake is adding them together and reporting them as separate customer enquiries.
| Conversion action | Count as a lead when | Verify by |
|---|---|---|
| Phone call | Answered, over the agreed duration, in the service area | Call log matched to CRM |
| Form submission | Name, phone and suburb all completed | Unique lead ID in CRM |
| Quote request | Quote sent to a real job address | CRM quote record |
| Booked inspection | Appointment in the calendar | Calendar entry matched to lead ID |
| Won job | Invoice paid | Accounting record |
| Page view or button click | Never count as a lead | Remove from primary conversions |
These are operational validation rules, not a reason to add every stage into one lead total. A complete form still needs checking for spam and service eligibility.
Test paid-search calls for source, campaign, duration, answered status and caller location. Use call-tracking software to connect those details with the enquiry record, then apply written exclusions for wrong numbers, suppliers, existing customers and calls too short to assess.
Check bidding signals and privacy
Review the attribution window, campaign conversion goals and primary versus secondary settings. Primary actions should reflect the outcomes you want bidding to pursue; keep page views and button clicks as secondary diagnostic events.
Compare platform totals with CRM enquiries and accepted quotes. Explain gaps through duplicate triggers, missed calls, attribution timing or missing records rather than forcing the totals to match.
New Zealand government privacy guidance recommends collecting no more analytics information than necessary, explaining its use, and keeping it anonymised and secure. Document purpose, notice, retention, access and data flows for recordings, form details and remarketing audiences.
Finish by labelling every action primary or secondary and removing soft events from the primary list.
How to Structure Campaigns by Suburb and Service
One campaign covering everything from a leaking tile to an industrial replacement gives you little control over which work receives the budget. If you want larger projects, you need to see whether repair enquiries are consuming the money intended for them.
Use this service-based structure as a starting point, not a requirement to create a separate campaign for every roofing material.
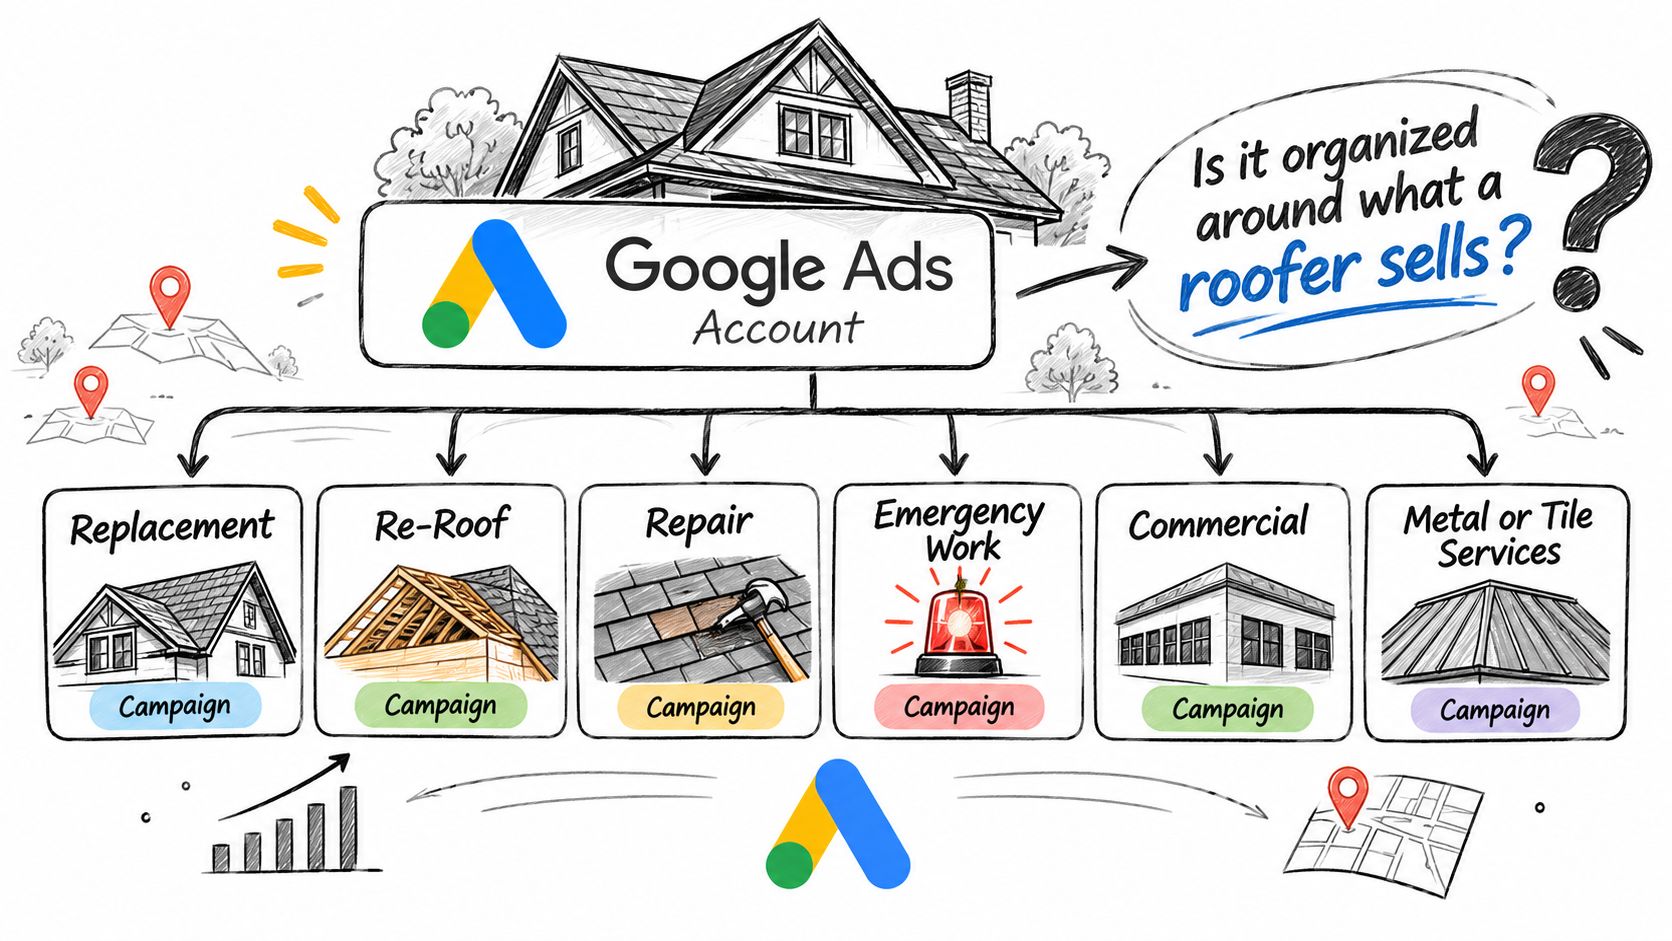
Check replacement and re-roofing, repair and emergency work, commercial roofing, and metal or tile specialties. Separate campaigns where you need distinct budgets, job values, service areas or landing pages.
Don’t fragment a small account merely to make its layout look organised. Closely related services can share a campaign with separate ad groups when they have the same budget priorities; commercial work deserves separation when residential demand would otherwise consume its allocation.
Match coverage to the crew
Say an Auckland roofer has nationwide targeting enabled. More budget won’t fix enquiries from towns the crew can’t economically service; narrower targeting and explicit exclusions will.
- Map real coverage. Include travel time, job size and the areas your estimators can reliably reach.
- Inspect location options. Use presence targeting rather than presence or interest for a locally delivered service, so interest in Auckland alone doesn’t qualify a distant searcher.
- Compare suburbs. Report spend, qualified enquiries and cost per qualified enquiry by suburb, reviewing the outer areas first.
Presence targeting isn’t proof of the customer’s job address. Validate the suburb through the enquiry itself before deciding that a location performs well.
Use the video as a companion when checking how your account is organised.
Check the promise after the click
A repair ad shouldn’t send visitors to a homepage that mainly promotes new roofs. Use a landing page for each meaningful job type, name the service area clearly, and make the phone number and enquiry form easy to find on mobile.
Submit the form and test the number from that page. A persuasive page isn’t useful if its enquiries never reach the office or the tracking system.
List each campaign beside its job type, service area, budget and landing page. Resolve mismatches before touching bids, and don’t create near-identical suburb campaigns unless you need separate control.
Sorting Search Terms and Blocking Wasted Clicks
Use the search terms report to classify what people typed, not just the keywords you bought. Start with the last 90 days, sort by spend, then compare conversions and qualified outcomes.
Search term groups and the action for each
| Query group | Typical example | Action |
|---|---|---|
| Replacement | roof replacement cost Auckland | Keep and bid for it |
| Repair | roof leak repair near me | Keep in its own ad group |
| Commercial | commercial roof coating | Move to its own campaign |
| Materials | colorsteel price per sheet | Add as negative |
| DIY | how to fix roof shingles | Add as negative phrase |
| Employment | roofer jobs Hamilton | Add as negative phrase |
| Competitor brand | [competitor name] roofing | Review before excluding |
| Out of area | roofers Tauranga, for an Auckland firm | Exclude the location |
The actions assume you sell installed roofing services, not materials, recruitment or DIY advice. Repair searches are only wasted spend when they don’t match your services or take budget from work you’ve deliberately prioritised.
Start with expensive mismatches
Add a column for query group and another for qualified outcome. Work down the highest-spend terms first, because an irrelevant query with substantial spend matters more than a harmless oddity with no clicks.
For core services, exact and phrase match provide a more controlled starting point. They still require query reviews because matching isn’t limited to identical wording.
Broad match can discover useful searches, but broad match on roofing is a poor default when your conversion signals are unreliable. Keep it only where you have a clear test budget, a maintained negative list and bidding you review weekly.
A keyword that produces cheap enquiries isn’t a winner if your estimator can’t turn those enquiries into suitable quotes.
Build a shared exclusion list
Create a shared negative-keyword list in Google Ads and apply it to every relevant campaign. Organise it so you can understand why a term was excluded later.
- DIY intent. Review phrases such as how to and tutorial, plus repair instructions your business doesn’t provide.
- Employment intent. Exclude jobs, apprenticeship and salary searches from customer-acquisition campaigns.
- Materials-only intent. Block sheet, supply-only and product-price queries where the searcher clearly isn’t seeking installation.
- Price language. Treat cheap cautiously. You may not want bargain-only enquiries, but cost-conscious homeowners can still become profitable customers.
Say a roof repair phrase-match keyword attracts searches about how much a tarp costs. Add the irrelevant phrase promptly and check the following week whether that query has stopped receiving spend; don’t promise that the whole campaign will improve within that period.
For out-of-area searches, maintain location exclusions rather than relying on a long list of suburb negatives. Investigate repeated distant place-name queries separately, since a local searcher can still type another town’s name.
Review negatives monthly for accidental blocks. A broad negative such as cost could remove valuable replacement enquiries, while a competitor term may deserve a controlled test rather than an automatic exclusion.
Finish by grouping the search terms, adding justified negatives and confirming the shared list is attached to the intended campaigns.
Working Out Your Real Cost per Qualified Lead
Illustration, not a benchmark: a $2,000 invoice divided by 1.15 gives approximately $1,739 in ex-GST media spend. With 20 qualified enquiries, the cost per qualified lead is about $87.
Use the saved ex-GST baseline consistently.
| Metric | Calculation | Use it for |
|---|---|---|
| Cost per click | Ex-GST spend divided by clicks | Diagnosing ad relevance only |
| Cost per enquiry | Ex-GST spend divided by tracked enquiries | Comparing suburbs and campaigns |
| Cost per qualified lead | Ex-GST spend divided by qualified enquiries | Deciding where budget moves |
| Cost per won job | Ex-GST spend divided by paid jobs | Judging whether the account is worth scaling |
Click cost is diagnostic, not proof of relevance by itself. Qualified-lead and won-job costs should drive allocation, supported by reliable marketing attribution.
Removing duplicates can make reported cost per lead look worse while making your decisions better. Pause persistently unproductive ad groups, check landing-page alignment and favour suburbs producing paid work.
Calculate all measures for the audit window. I’d require qualified-lead cost to hold for two months before increasing budget, allowing for quotes that haven’t yet closed.
Booking Your Audit Review This Month
Fix the top three red flags before increasing spend. Start with billing and conversion reliability, then choose the targeting or query problem with the clearest commercial impact.
Keep your baseline file and date each change. Incorrect locations can be corrected immediately, but some fixes need a month to show meaningful results, especially when inspections, quotes and customer decisions happen after the original click.
Judge a change against qualified opportunities and paid work, not just a cleaner-looking dashboard.
If more than three checklist rows need fixing and you don’t have time to investigate them, a professional review is a practical option. Bluelight offers a free 30-minute ad account review covering what’s working, where budget is leaking, and the two or three moves most likely to change the numbers fastest.
You retain full ownership of your Google Ads account and data at all times. Any reviewer should work from your commercial priorities, including the jobs you want and the capacity your crew has.
Make the audit a monthly habit as search terms and enquiry patterns change with seasons and storms. Export the baseline this week and decide whether you’ll implement the priority fixes yourself or book a review.
Bluelight’s free 30-minute ad account review helps roofing owners check whether reported leads are genuine and identify where advertising budget is being wasted. Visit Bluelight to book your review and bring your campaign exports, enquiry records and service-area list so the discussion stays focused on work your crew can quote and win.
Related service Google Ads for Roofers